This process enables you to create a custom CloudyCluster Image with additional software or libraries that you need.
Before you create a custom image its best to run CloudyCluster once and run a sample job to see how it all works. You can do this by following this Sample Job Tutorial
Image Creation
Follow the steps below to customize the image to your specific needs.
NOTE:
Creating a Custom Image requires that you prevent the CloudyCluster software from starting.
This can be accomplished via one of two methods through the Marketplace or directly with the image:
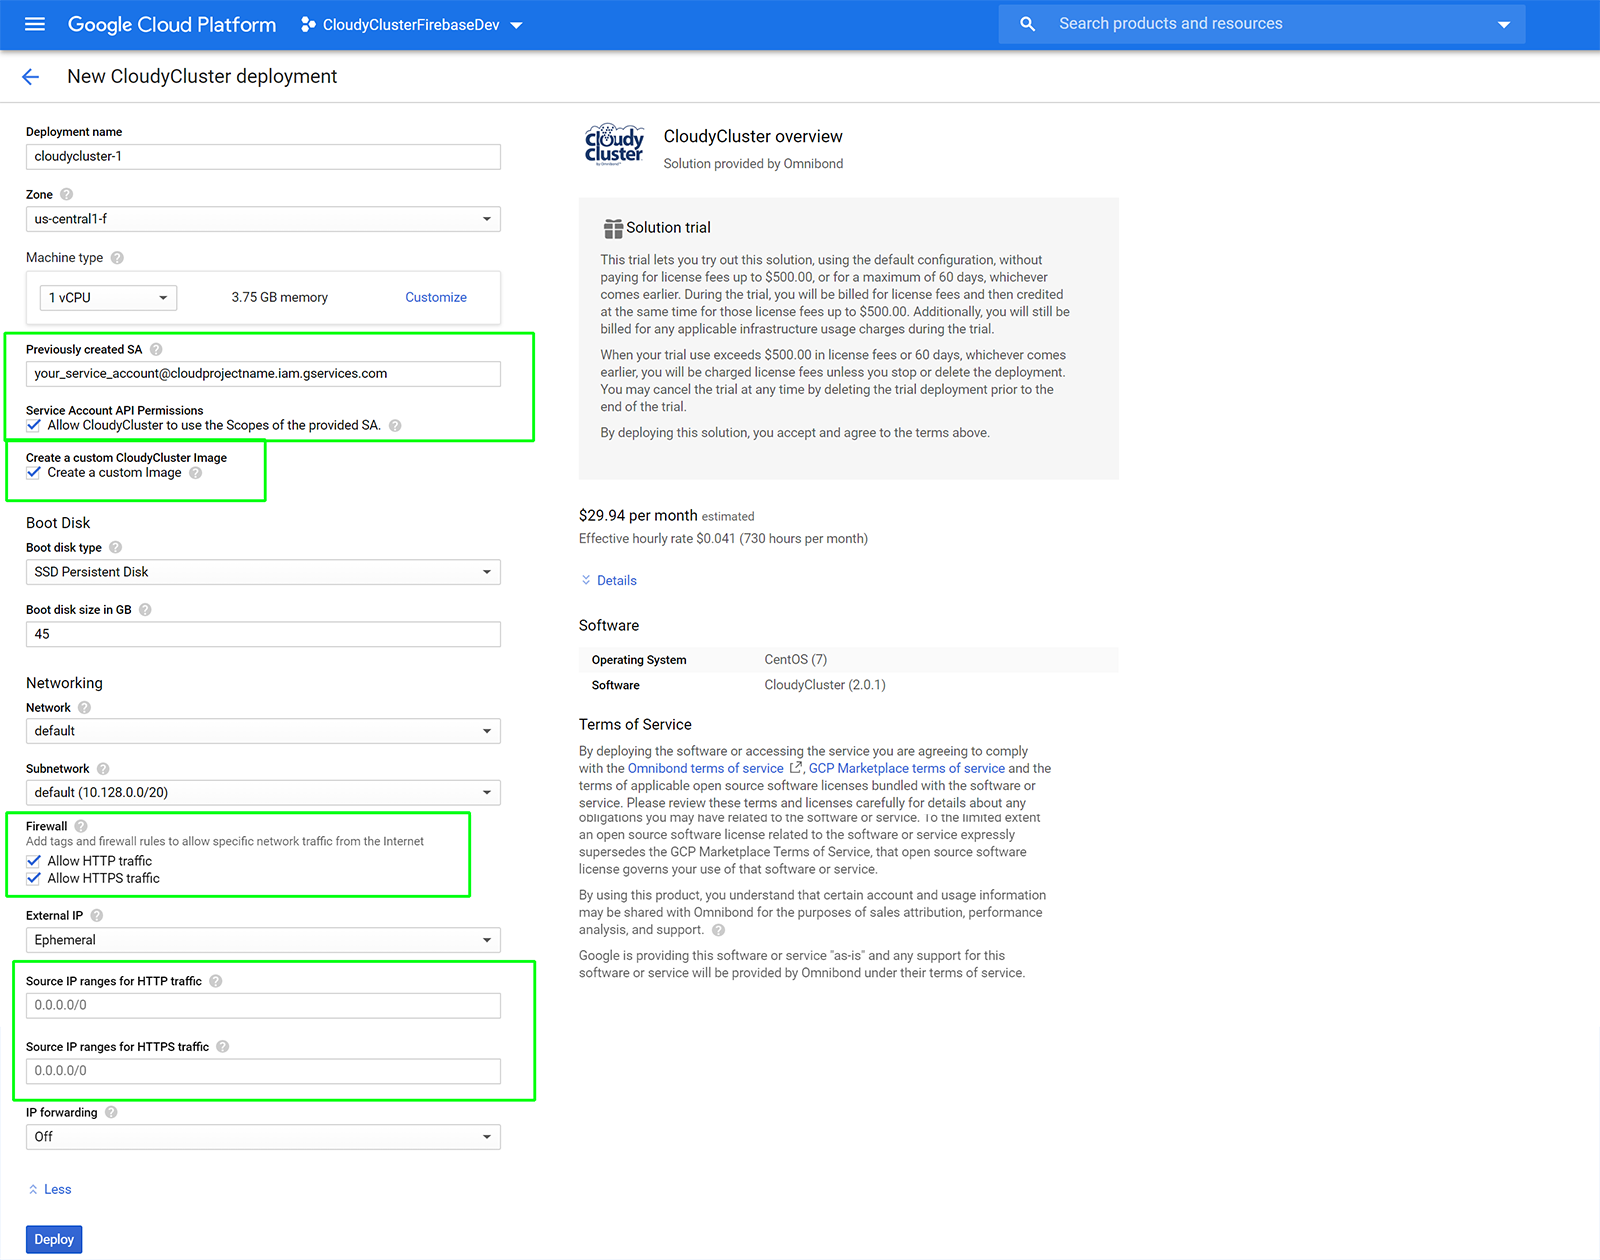
Starting with the marketplace image you can select Create a custom CloudyCluster Image
Complete all of the required fields
Click Deploy
Proceed to the GCP Console, and when your instance is ready and in the status of running, you can SSH into the VM and install the software you need.
Prior to saving the image, follow the steps below in the section Finalizing under Saving the Image.
or
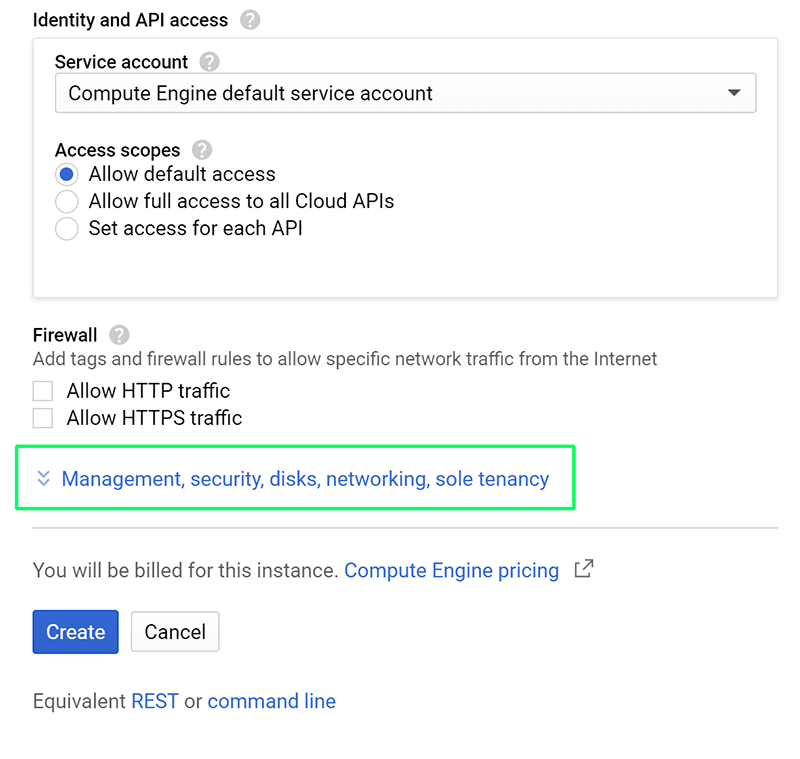
From the GCP Console hamburger menu, choose Compute then Images. From the list select the CloudyCluster image that will become the basis for your customized image, check the box next to its name. Then from the top navigation, click Create Instance. In the Create an instance form, provide the names and parameters for the VM and then near the bottom of the form, click the drop down section labeled: “Management, security, disks, networking, sole tenancy”
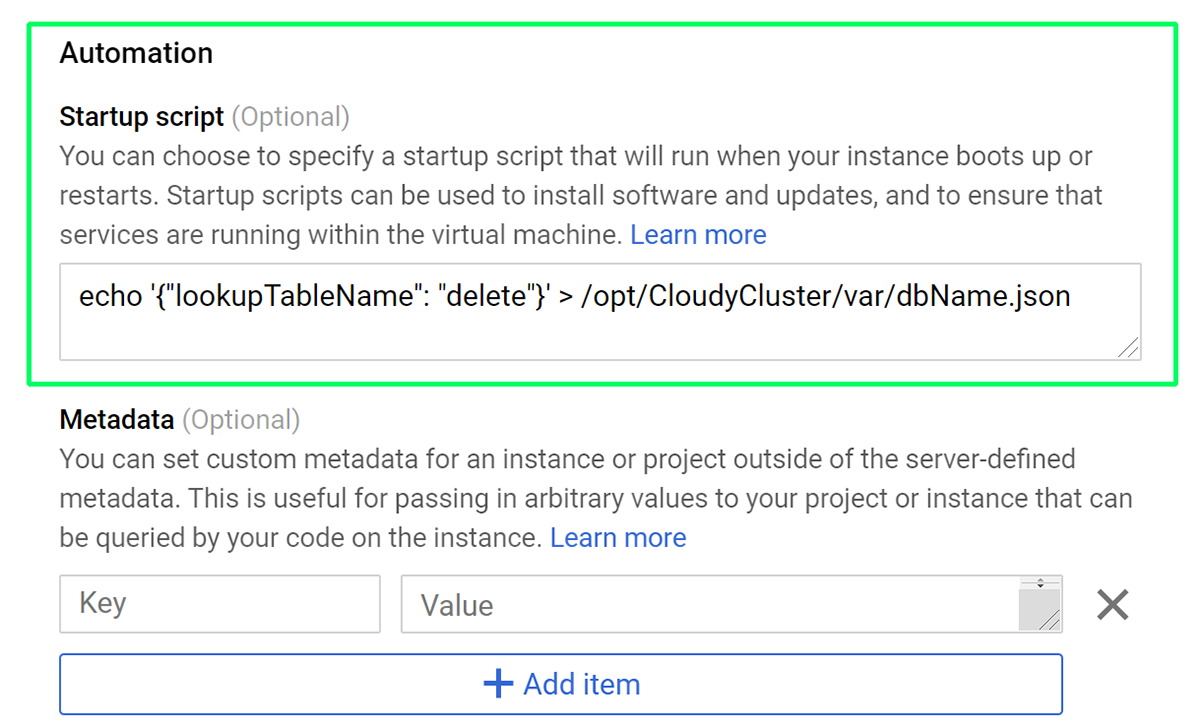
In the Create an Instance form, in the Automation section:
Include the following in Startup script to disable the startup sequence:
'{"lookupTableName": "delete"}' > /opt/CloudyCluster/var/dbName.json
When all other settings are completed, click Create to launch the VM instance.
Add desired software and or package configurations - then proceed to the next steps.
Finalizing
Prior to finalizing and saving/creating the image, to allow the CloudyCluster services to run you will need to delete the file created earlier to allow the image to launch normally: rm /opt/CloudyCluster/var/dbName.json
Saving the Image
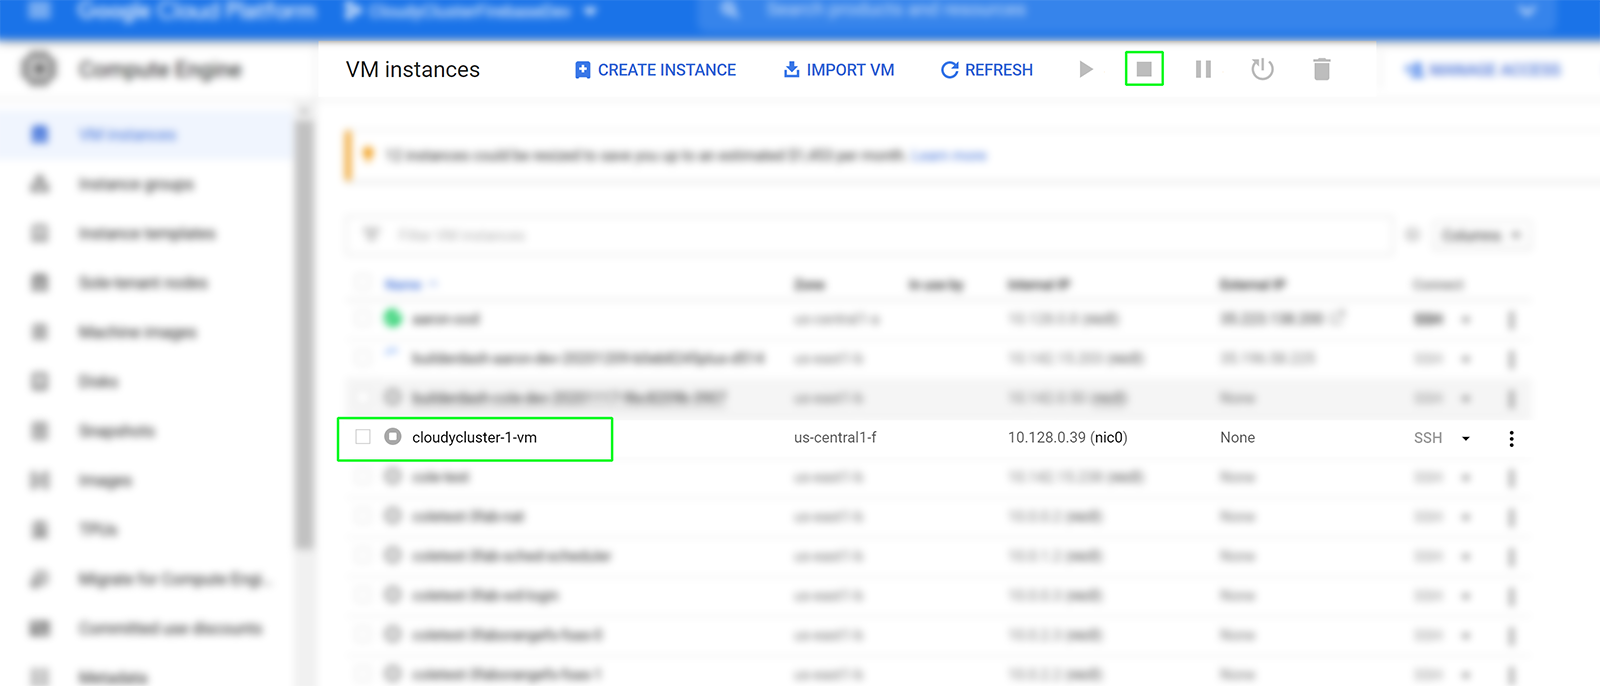
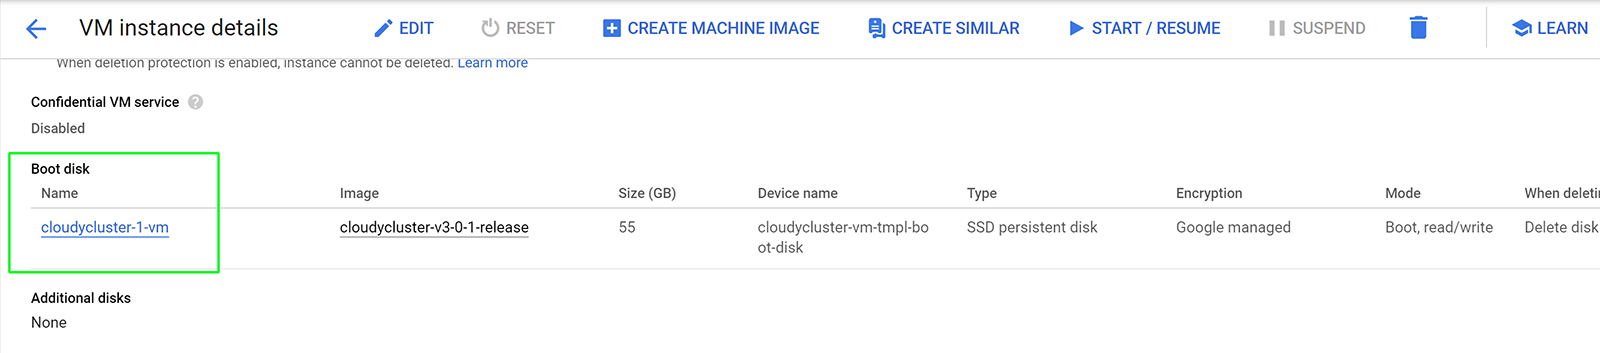
In order to save the newly customized image, first stop the instance. After it is stopped, click on the instance name in the list of your VMs. Inside the Instance Details, scroll down to the Boot disk
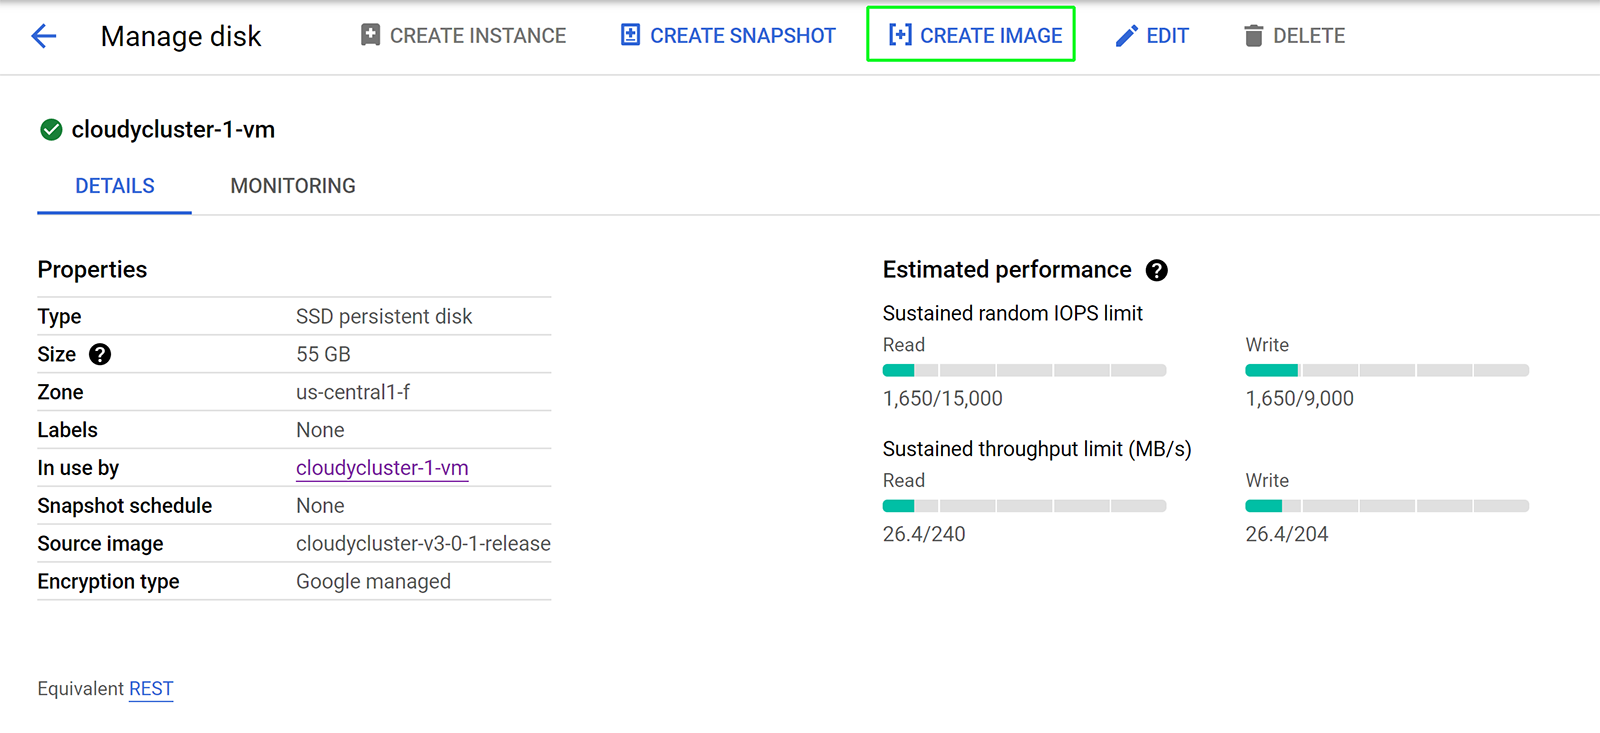
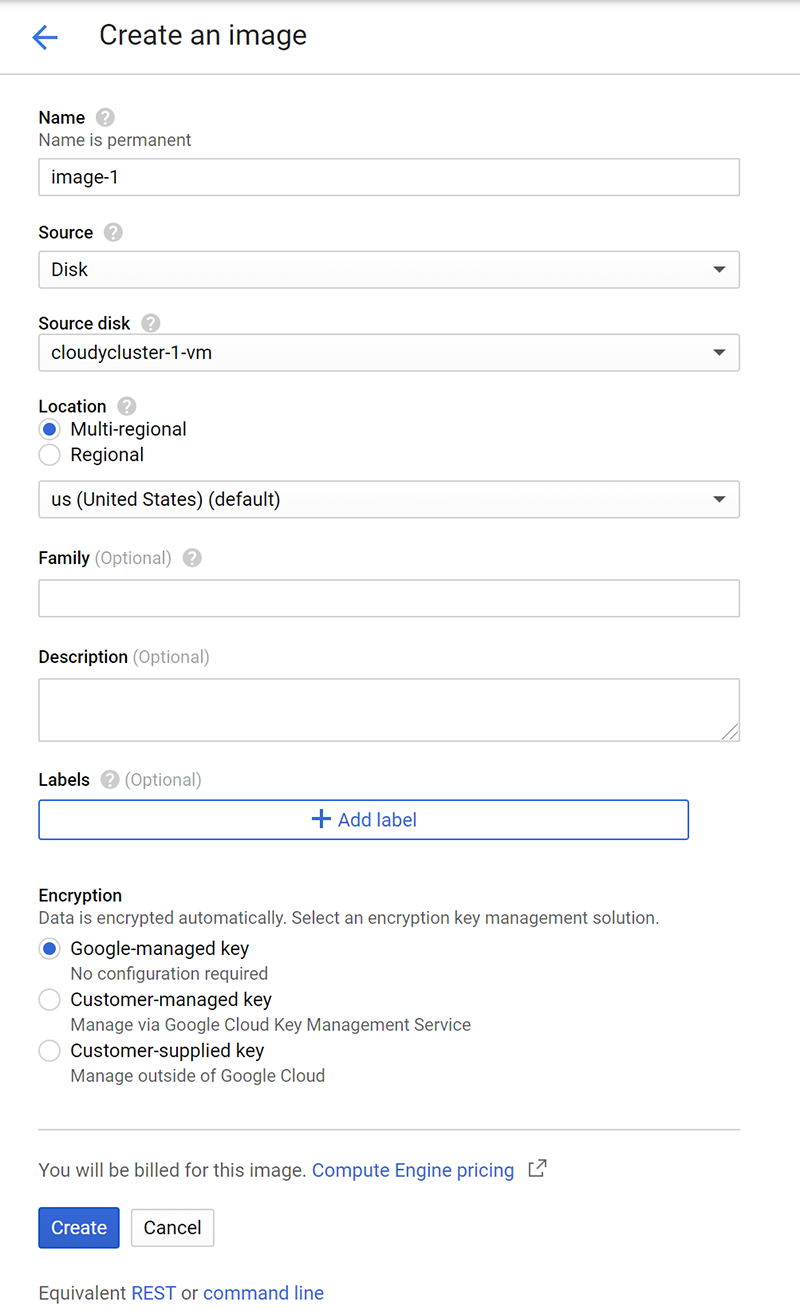
Click the Boot disk image name and then you’ll be able to click the Create Image icon.
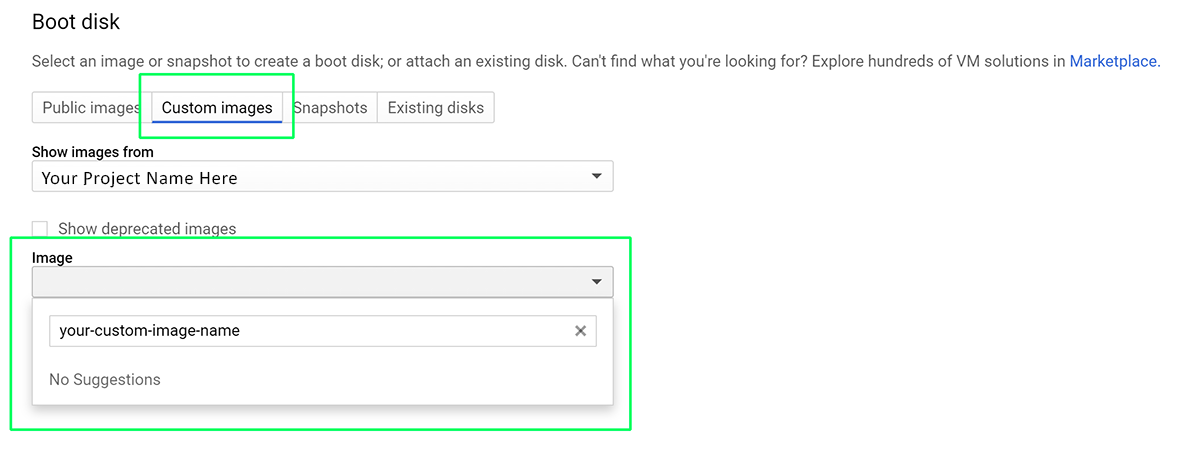
To use the newly created custom image you can launch it from the Console GCP (not from Marketplace).
Click Images from the Compute menu. In the Boot Disk section of the Create Instance detail page options, select the Custom Images tab, then the saved images within your Project will be listed; select your newly created image and then click Create the Instance.
As an alternative launching method you can also go to the Compute, VM Instances dashboard and click Create Instance. From the form, in the Boot Disk section, select your image, as noted above.
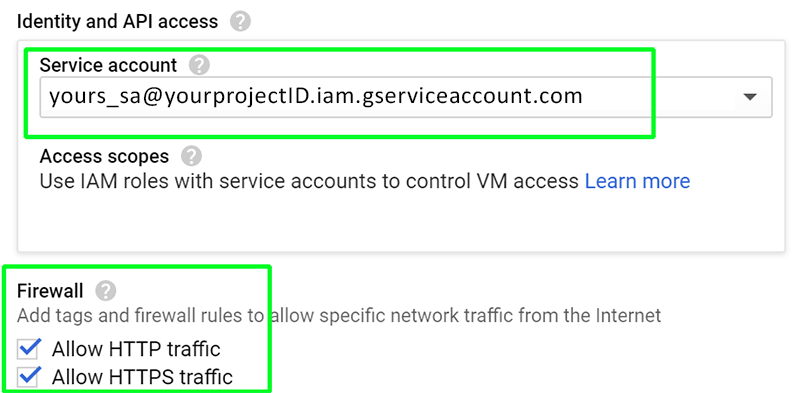
NOTE:
Be sure to use the appropriate Service Account and check both HTTP/HTTPS:
Automate The Process
If you want to automate the process of adding software to the release CloudyCluster AMIs, you can use the builderdash project. The Builderdash project was created to provided a build system, that we use internally to build CloudyCluster releases. It is open sourced so the same methodology can be used to add Software to the Image. The project is available on Github.