After you have launched the Image, complete the following initial setup tasks:
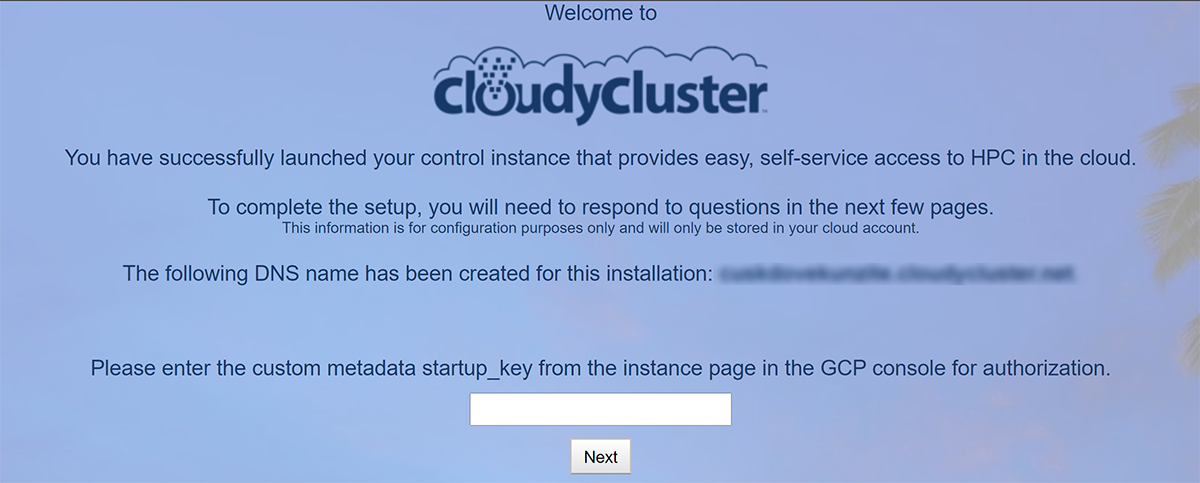
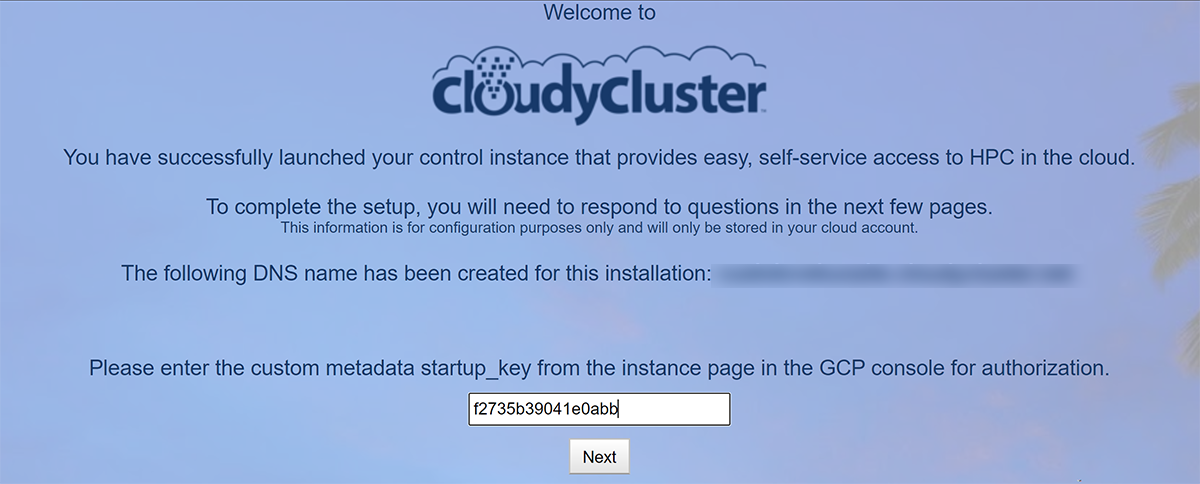
It takes about 5 minutes for the instance to come up and self configure fully. Once it does, you will see the following:
Once DNS propagates, you will be taken to the following page and prompted to provide the Custom metadata startup_key to authenticate that you launched the instance.
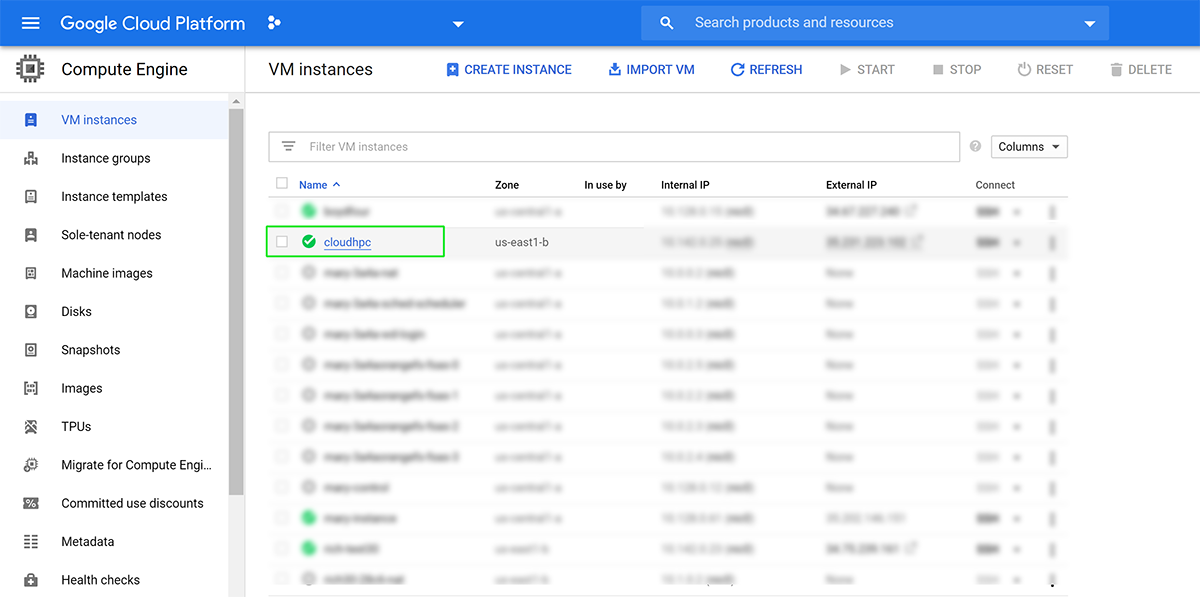
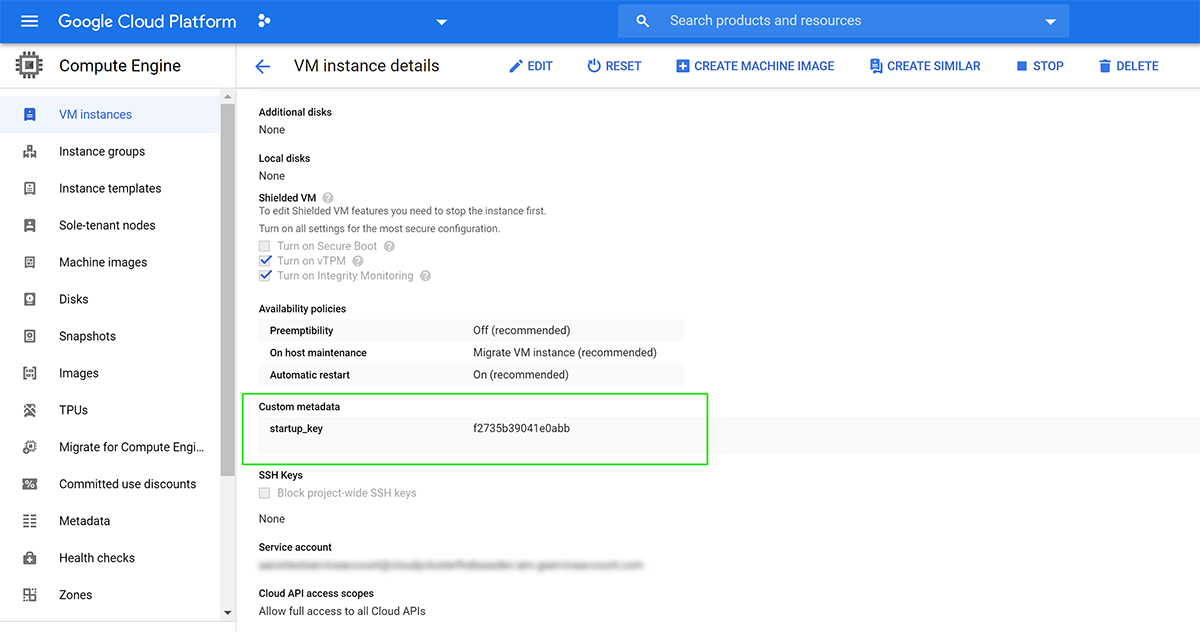
In GCP, click on the VM Instance Name, scroll down and you will see the Custon Metadata Field. Copy/Paste the unique value into the CloudyCluster prompt.
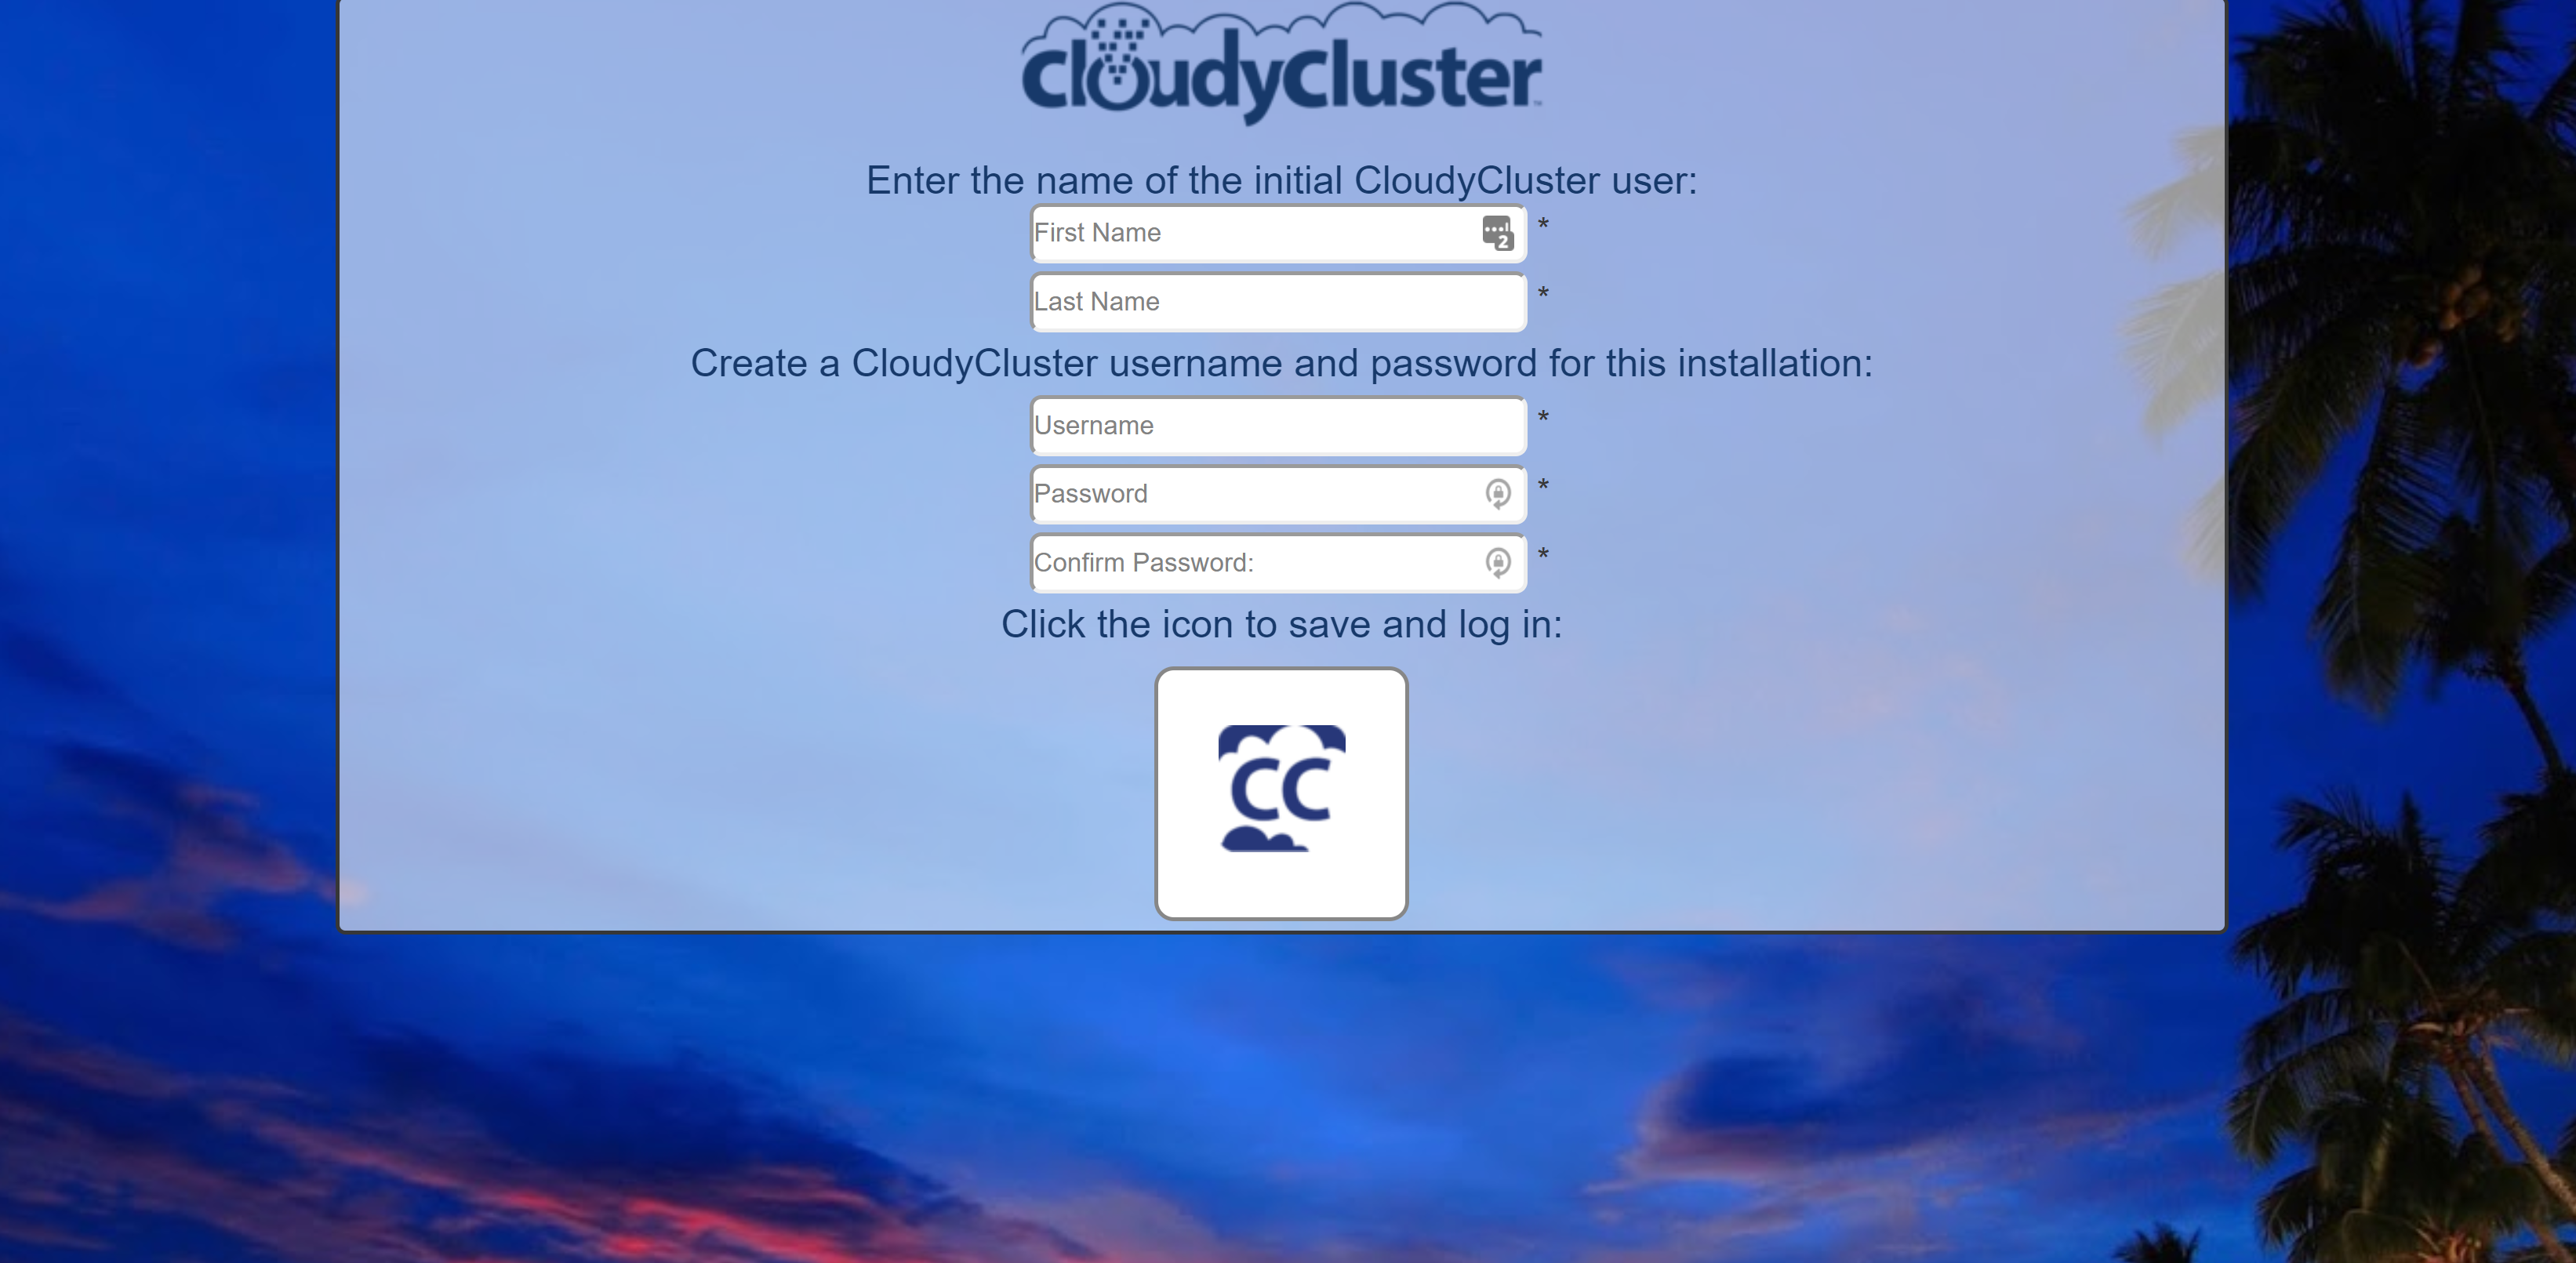
Next, provide the following Admin User information to complete the initial setup:
(All information you provide is used only in CloudyCluster and never leaves your Google Cloud Platform account.)
Create a CloudyCluster username and password to be encrypted and stored in the database in your GCP Account.
Your password must contain at least 8 characters and include a capital letter and a number.
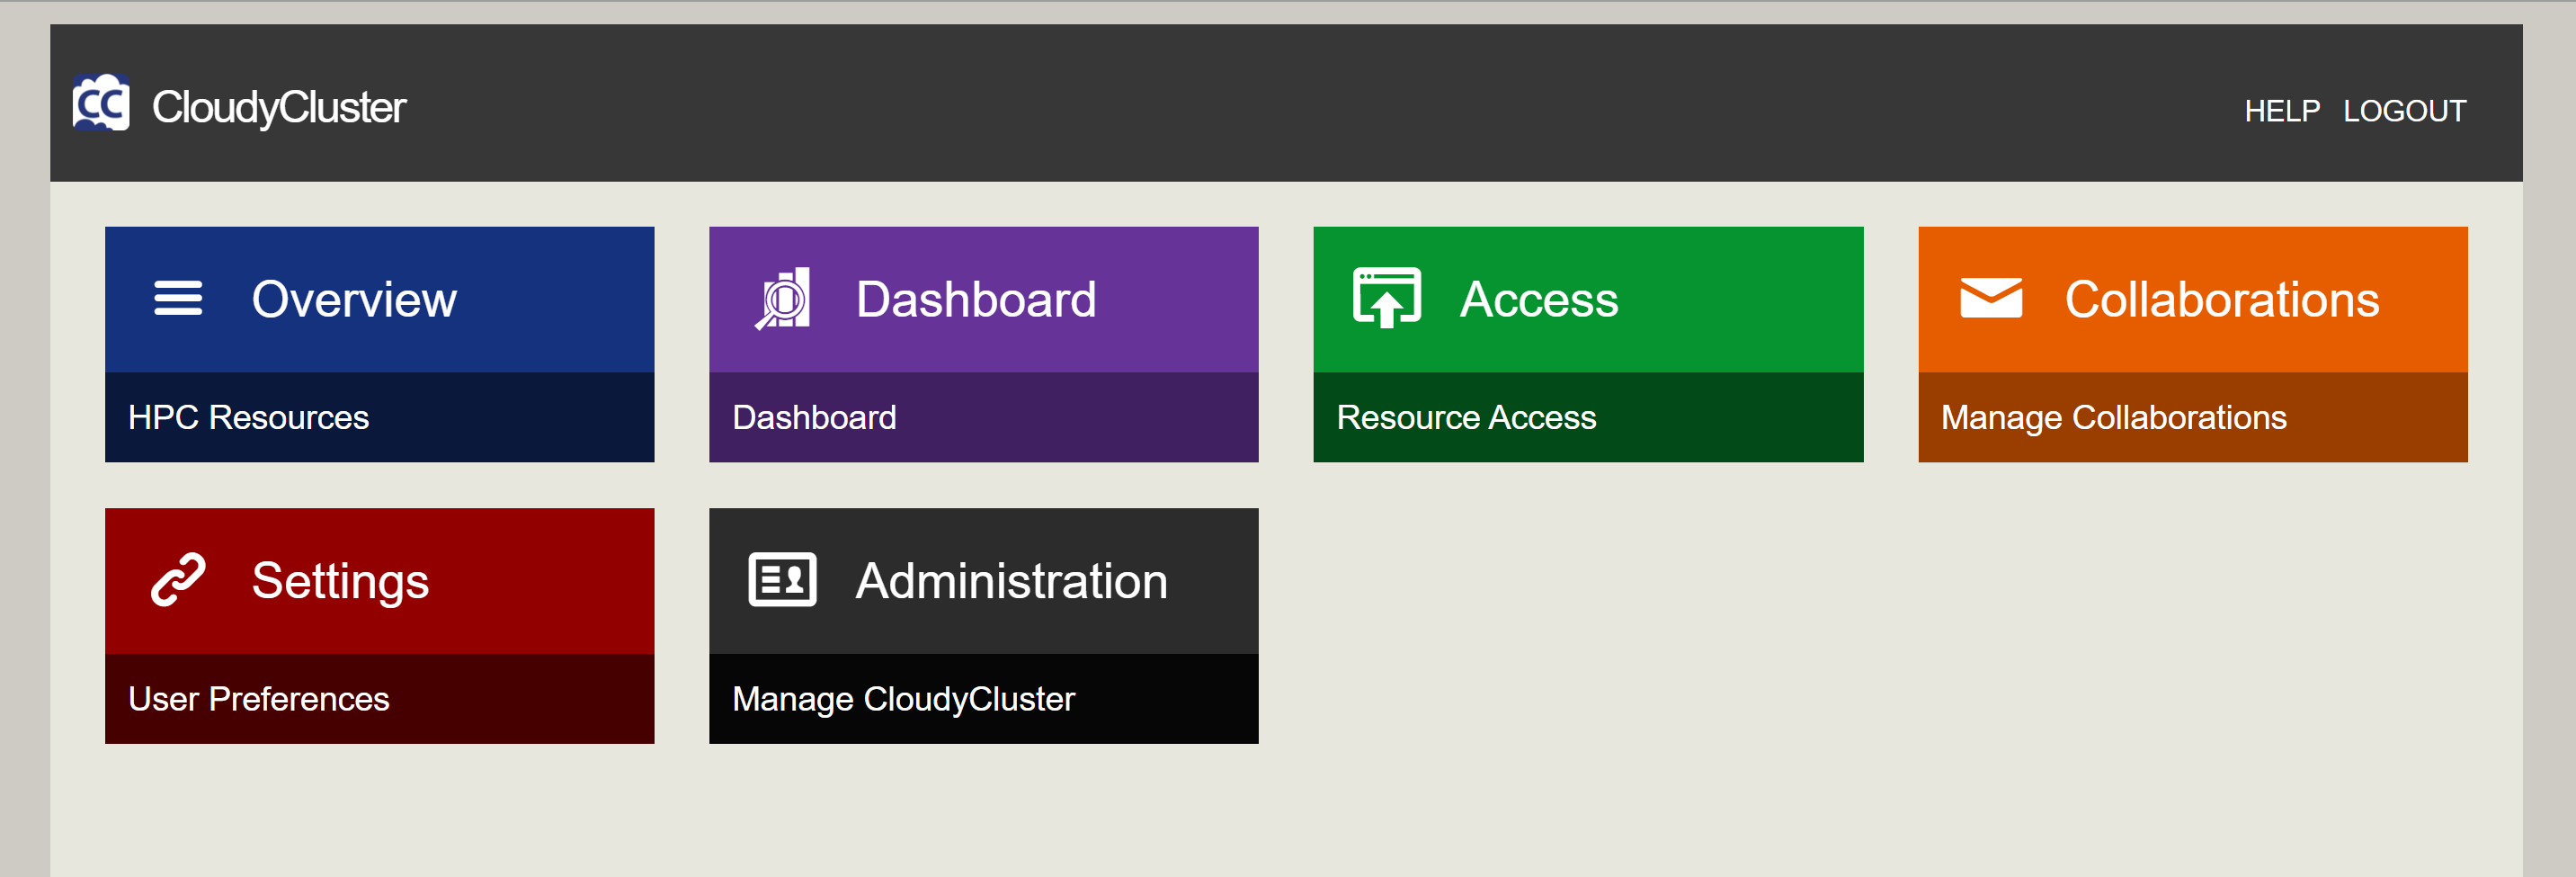
You have successfully completed the initial control instance configuration.